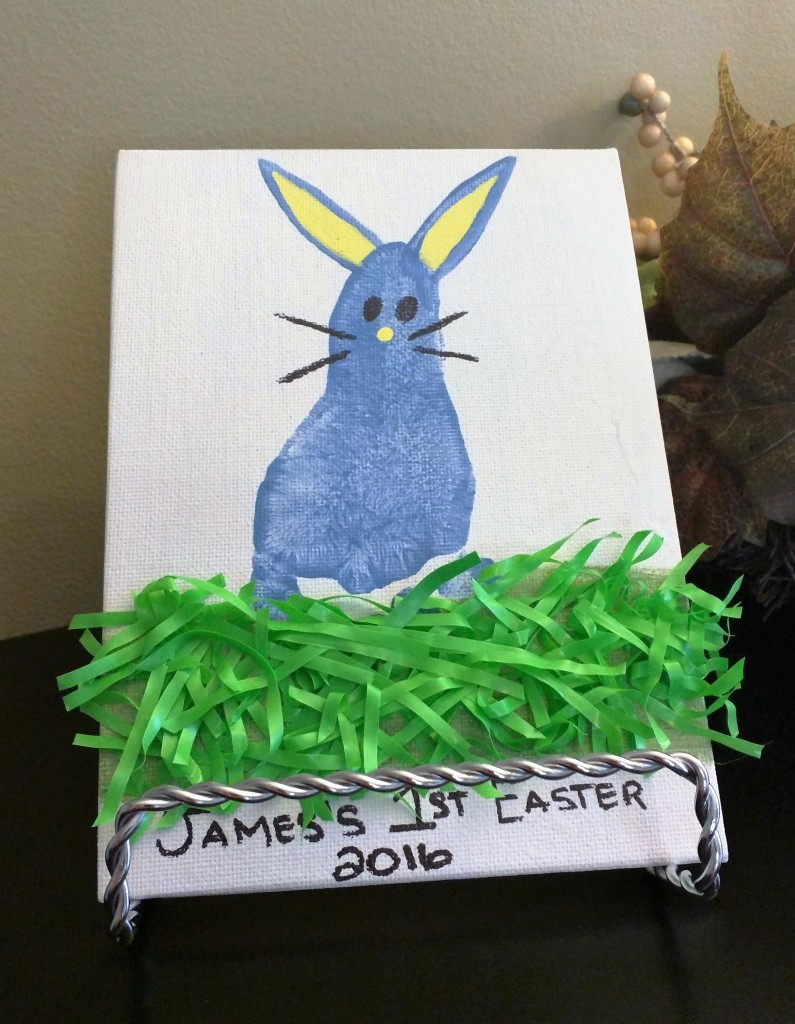
 It’s almost Easter and that means it’s time for some Easter Crafts. And this year I get to incorporate baby (and kid) crafts into the mix because I have a baby to use. So first up I made a Footprint Easter Bunny and as you probably guessed I used James’ footprint. This could really work for any baby or child you would only need to change the canvas size to fit the child’s foot. I though this was the cutest thing ever so I made 6 of them. That’s right 6. One for each set of Grandparents, one for Aunty Michelle, Mon Oncle Joey and Mon Oncle Michael. Because of course they’re going to love it as much as I do.
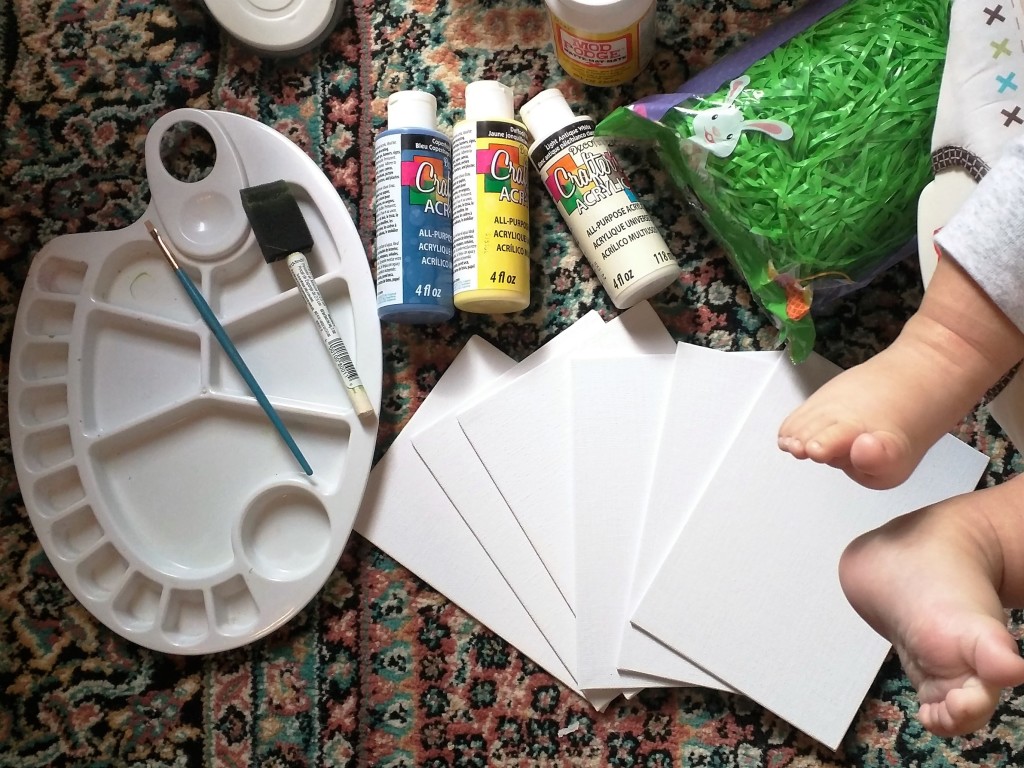
Footprint Easter Bunny Supplies:
- Baby (or child) Foot
- Paint (at least 3 colours —footprint, grass and ears)
- NOTE: use washable non toxic paint as this is safe for babies.
- Paint Brush and Foam Brush
- 5 x 7 canvas (or size to fit child’s foot)
- Sharpie
- Crinkle Paper (green)
- Mod Podge
 Footprint Easter Bunny Instructions:
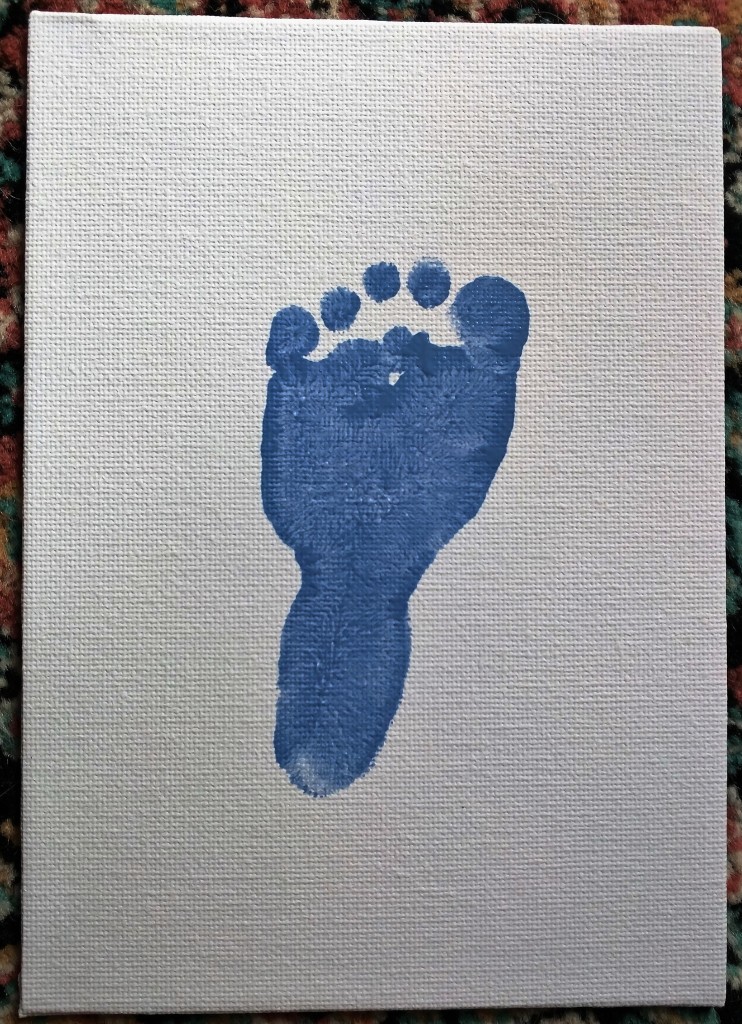
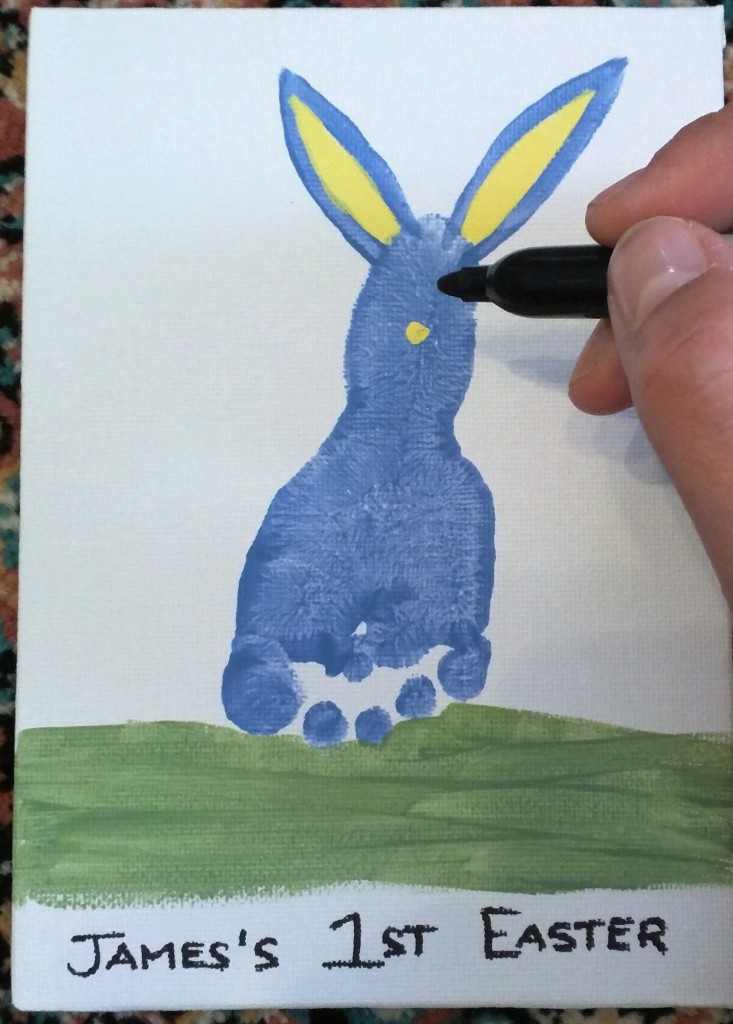
- Sit baby in a seat (high chair would work nice — if newborn then do this when they are asleep) and wipe down foot. Use the foam brush to paint the bottom of the foot. You can use any colour you’d like – this will be the colour of the bunny.
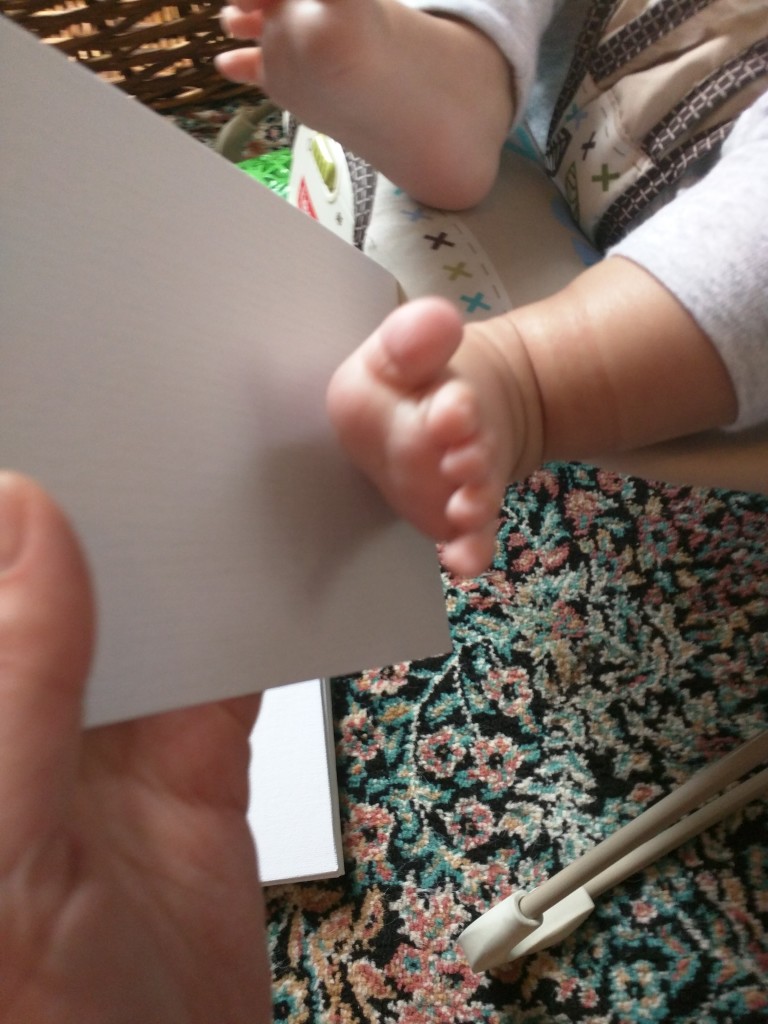
- Once you have good coverage on the foot, hold it steady while you place the foot on the canvas. Make sure you press hard enough to leave a print (but not too hard — you don’t want to make the baby cry especially if you plan on making more than one). Quickly remove the canvas trying hard not to smear the print. Repeat for as many as you plan to make, reapplying paint when necessary.
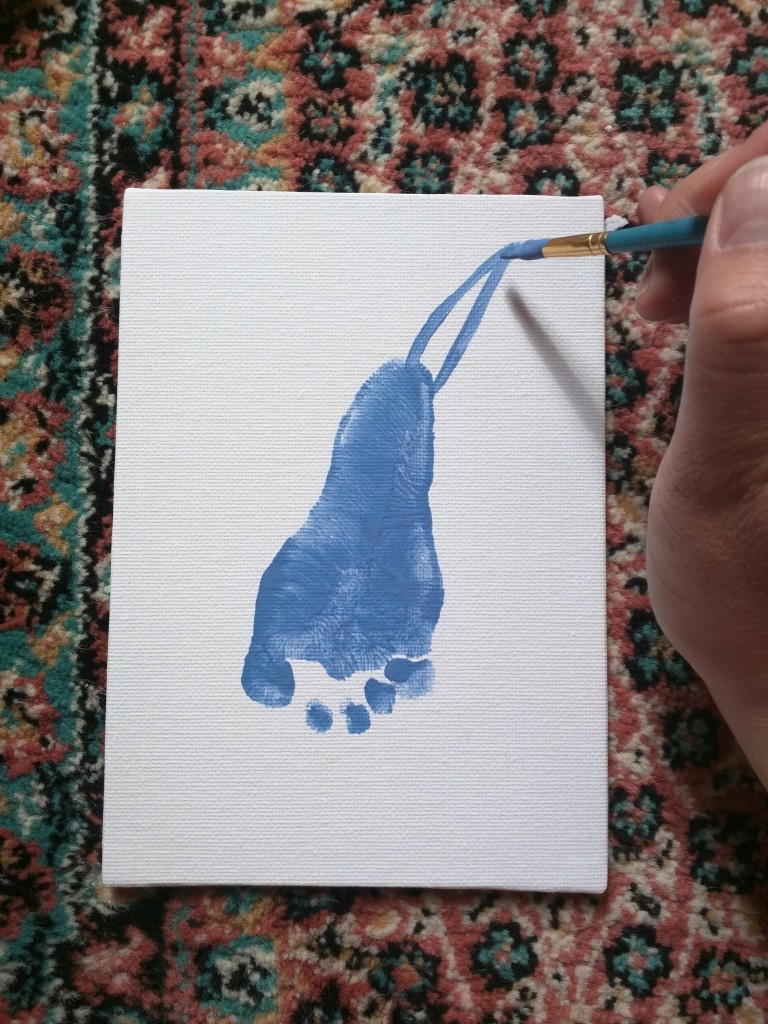
- Once your canvas is dry and you’ve washed the paint off your baby’s (or child’s) foot, use the paint brush and the same colour paint to draw the outline of bunny ears. You can make these as thick or think as you’d like.
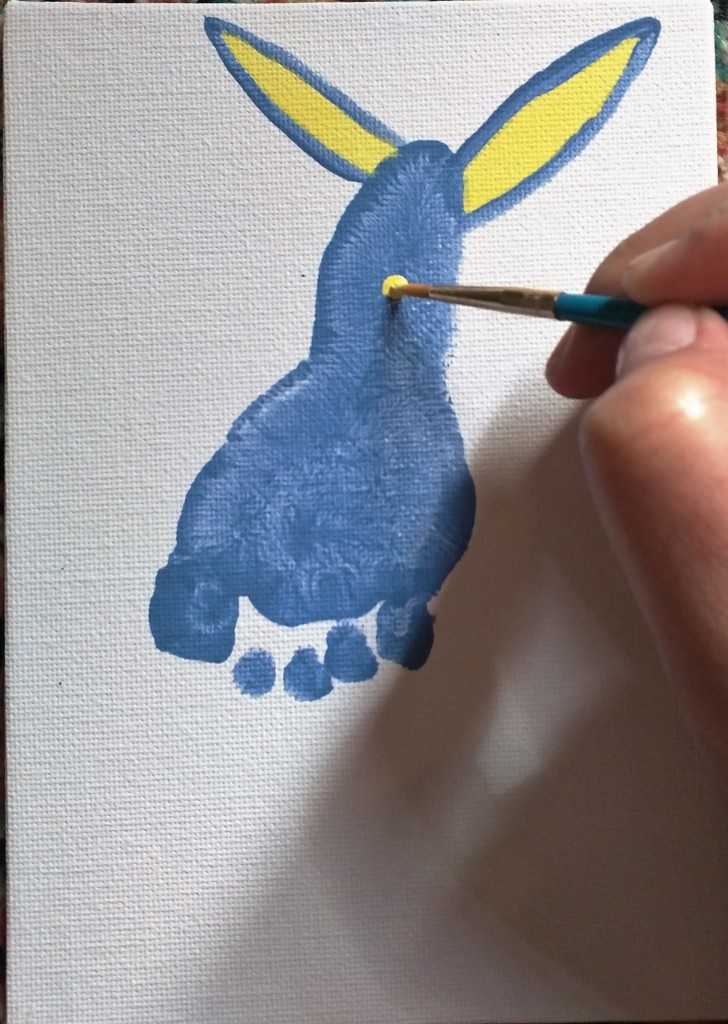
- Using a different brush (or the same one but cleaned) use a contrasting colour to paint the inside of the bunny ears. Also use the brush to dab on a bunny nose.
- Using another brush (or the same brush but cleaned) paint some grass directly below the footprint. Leave enough room at the bottom of the canvas to write the baby’s name. Let dry.
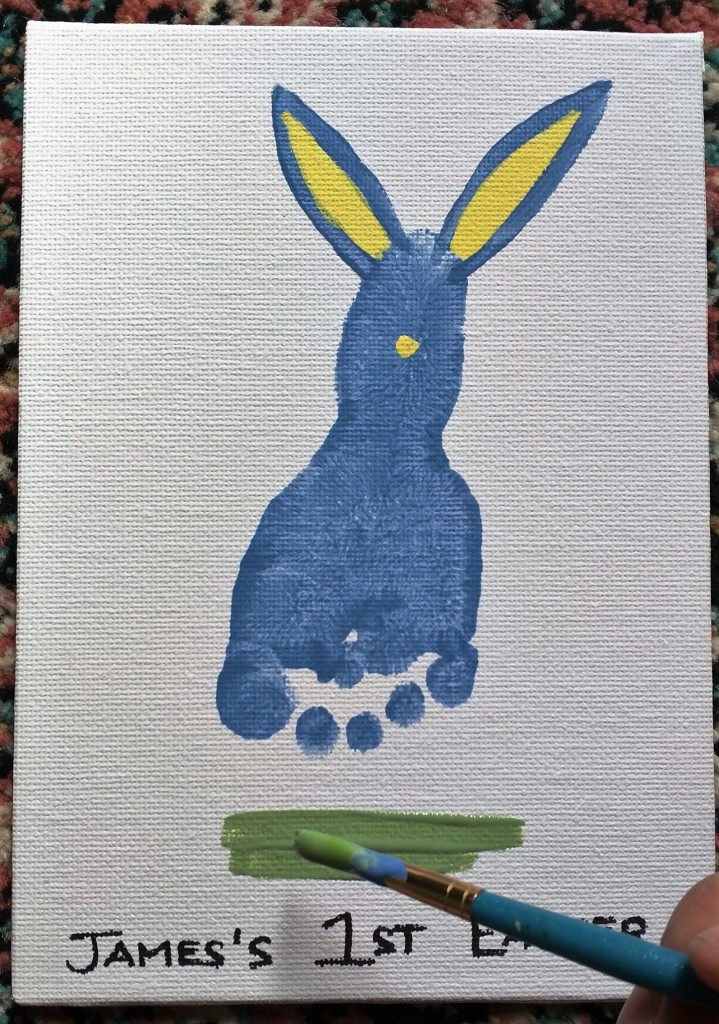
- Use a black sharpie to draw 2 eyes and whiskers. Also use the sharpie to write the baby’s name at the bottom of the grass.
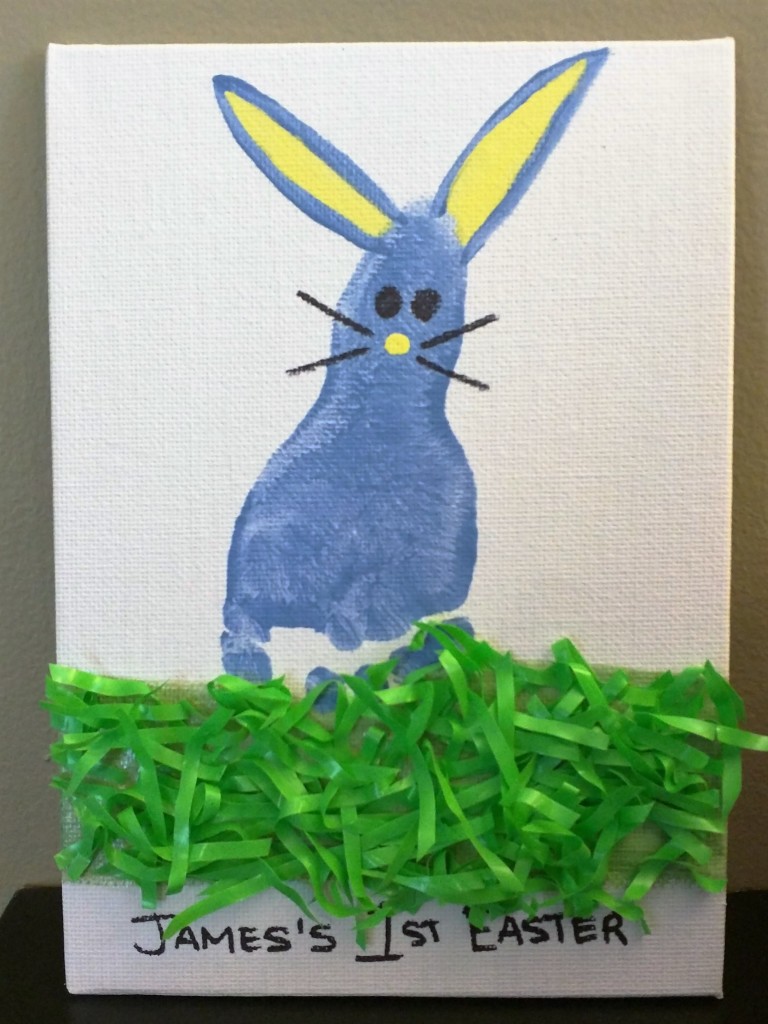
- OPTIONAL: Apply a thick layer of mod podge using the foam brush to the grass area. Apply a good amount of crinkle paper to the mod podge and let dry. I placed a book over mine to make sure the crinkle paper sticks to the canvas while it dries. I made this optional because this made the biggest mess. It’s still making a mess every time I move the canvas around. But I love the added texture.
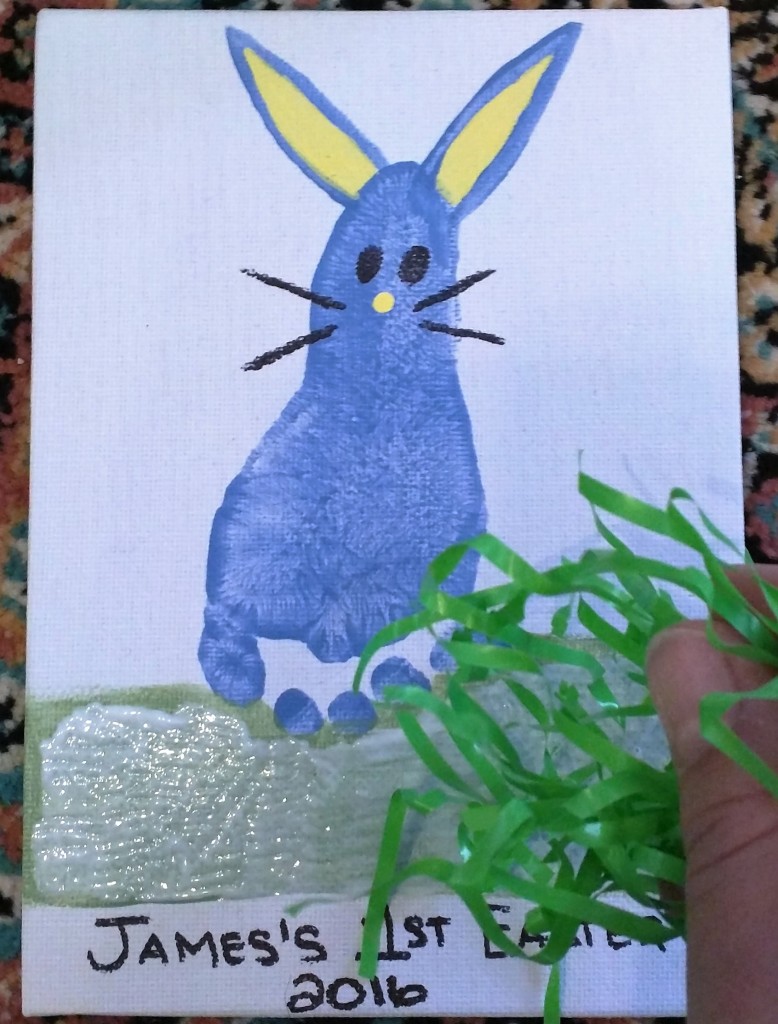
- I also used the Sharpie to write on the back of the canvas to and from and also the year.
- Repeat for as many canvas as you’d like to make.
Happy Crafting,
Ashley